This document goes over how to update the OneStream Excel add-in installer file for OneStream users. Any time OneStream is upgraded to a new version, the Excel add-in will need to be updated as well. Some updates to the Excel add-in may be optional depending on the version of OneStream, but we’re going to play it safe and update the add-in to match the OneStream version every time to prevent any sort of possible errors.
We’ll need to replace the .msi file for the Excel add-in otherwise users will download the old version every time. Please note these instructions are subject to change depending on how drastically OneStream changes up their services again.
- Navigate to OneStream’s Solution Exchange website. Link is provided below.
https://solutionexchange.onestream.com/Dashboard/home/app/browse
You’ll need to login with your OneStream account, so be sure you have one.
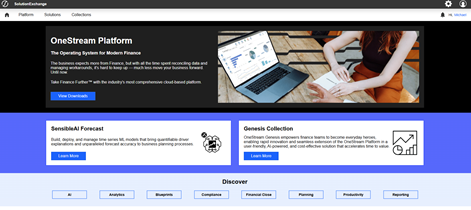
- Click the Platform tab.

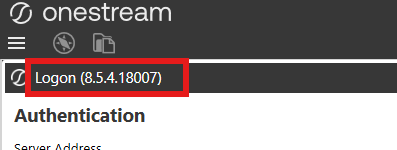
- Set the Platform Version to the current version of OneStream that we have. This can be found when you try to login to OneStream.
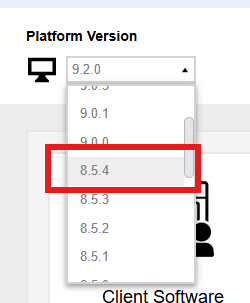
- After selecting the correct Platform Version, click the Download button in the Client Software box.

- A .zip file will be downloaded shortly. It will contain two (2) folders. OneStreamDesktop and OneStreamExcelAddin. We’re only concerned with the OneStreamExcelAddin folder, so extract that folder only.
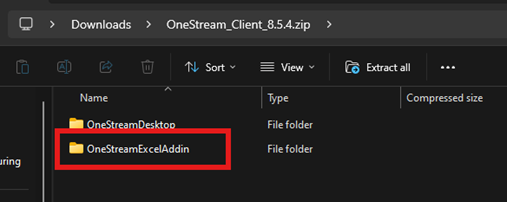
- Drilling into the folders will lead you to the .msi file that we’re looking for. It should be OneStreamExcelAddin > en-us > OneStreamExcelAddin-[version number].msi or something similar.

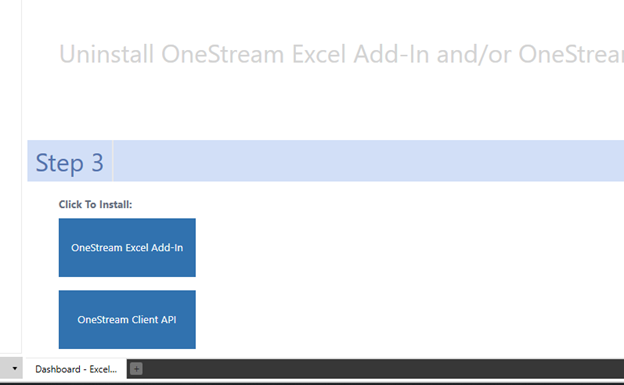
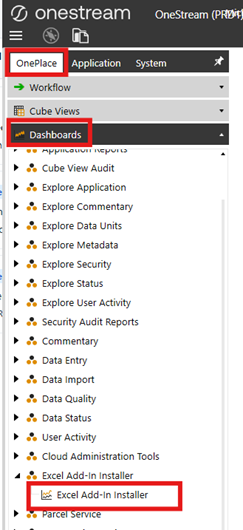
- Now we can replace the older .msi file in OneStream. Login to OneStream as you normally would and navigate to the Excel Add-In Installer dashboard. It will be located in OnePlace > Dashboards > Excel Add-In Installer > Excel Add-In Installer.
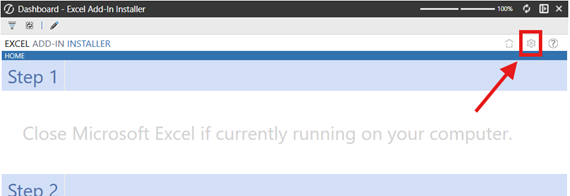
- Click on the Excel Add-In Installer dashboard to open it. Once open, click on the settings cog on the upper right of the dashboard.
- Next to the OneStream Excel Add-In: option, click the Upload button.
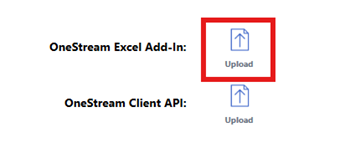
- Find the .msi file from earlier and open that file. This will begin uploading the file into OneStream.

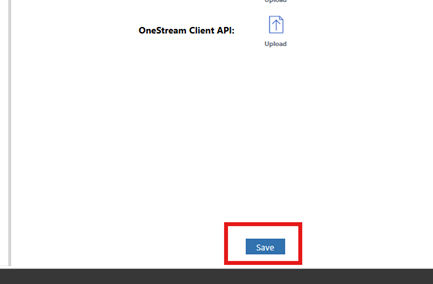
- Wait for the file to finish uploading. You’ll get a pop up letting you know whether or not the upload completed successfully. After getting a successful pop up message, click on Save.
The installer is now updated and users will be able to install the updated Excel add-in. They will have to uninstall the old version of the Excel add-in first before installing the newer version.