This document goes through the tasks that must be completed by IT early on the first day of month through OneStream. This prevents interruptions in finance and ensures they can complete their end of month tasks properly. Ideally, these processes will be automated, but this document will cover the manual execution in case no automation is in place. These steps are from various meetings with Nova Advisory, the third-party company who previously managed OneStream. Recorded Teams meetings on these topics can be found in the IT Dept’s SharePoint’s OneStream folder.
Quick Reference
Summary
- Load FX rates for month
- Update Task Scheduler
- Update Global Time
Loading FX Rates
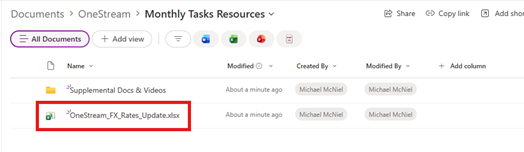
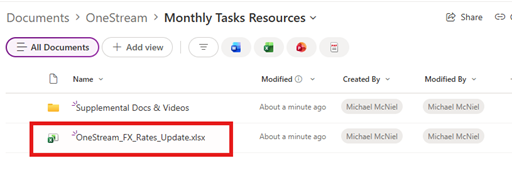
New FX rates must be loaded in from the Excel sheet that can be found in the IT Dept’s SharePoint. The following link will take you to the OneStream Monthly Tasks Resources folder where you can find the Excel sheet.
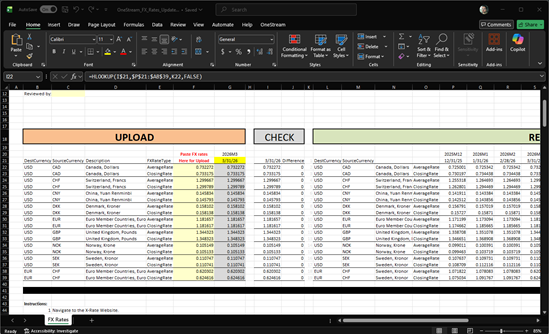
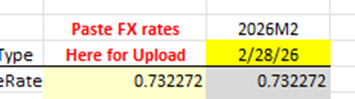
Upon opening the file, you should see something similar to this where you can upload FX rates. This is where we’ll be making changes to the FX rates.
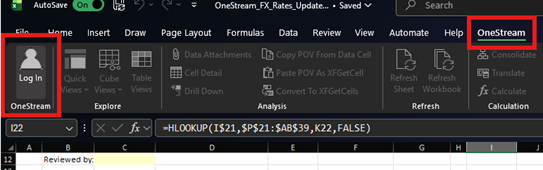
Select the current production application (might be named differently than shown) and click Open Application.
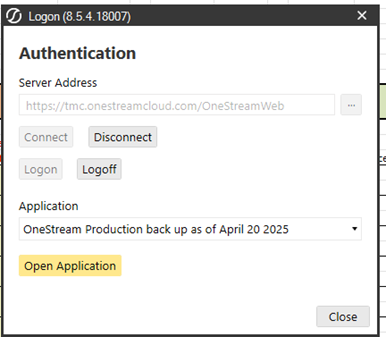
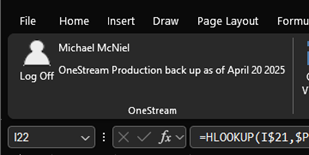
Once logged in, you should see your name and application in the top left corner of the screen.
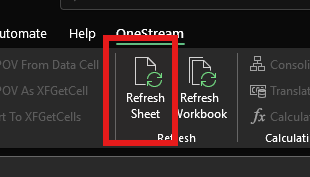
You may or may not see some of the values change. Either way, it’s okay. We want to make sure that we’re syncing up with what’s currently in OneStream that way we don’t overwrite the values for the previous months by mistake.
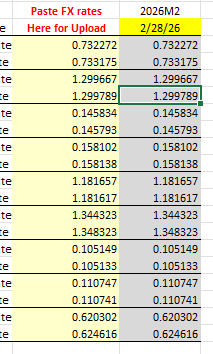
Your cells should look similar to this. In this example, we’re updating the last day of February.
This is the website we’ll be using for this example, but you’re welcome to use any FX rates website you’d like if you know what you’re doing. For simplicity, we’ll stick with X-Rates. (I’d really recommend using an AdBlocker on here.)
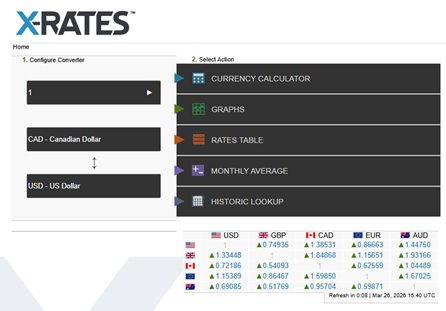
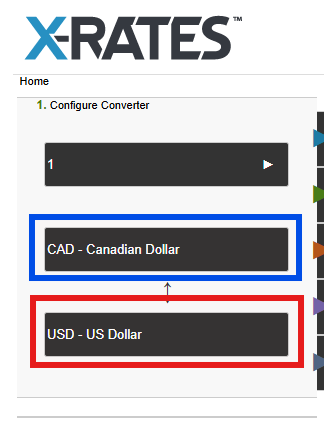
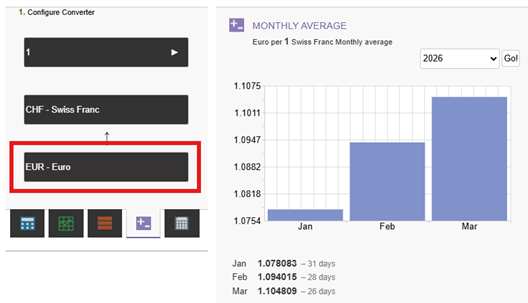
We’ll check each of the source currencies for their average rate in X-Rates and paste these values into their respective cells. On the X-Rates homepage, set the source and destination currencies. The Source Currency will be the top drop-down box (Blue). The Destination Currency will be the bottom drop-down box (Red). Start with whatever source currency you want, but this example will start with CAD (Canadian Dollar) since it’s the first on the list.
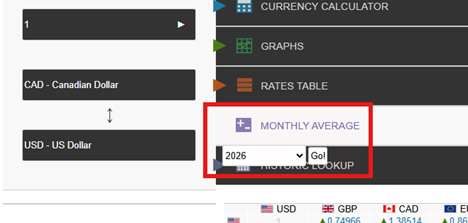
For average rates, we’ll want to select the Monthly Average option. Hover over Monthly Average, select the correct year, then click Go!
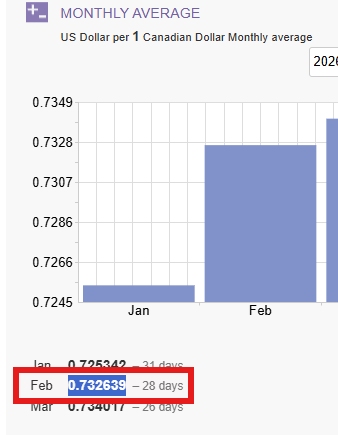
You will then be provided with the monthly averages for all months in the year so far. Copy the decimal number for the month that you’re wanting to update. Since we’re wanting to update the February values in our example, we’ll select the decimal number next to the Feb option.
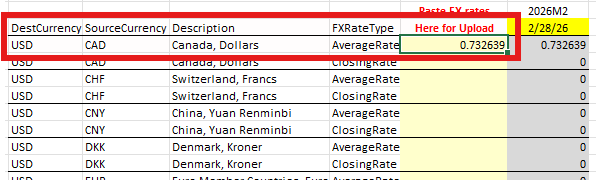
Paste this value into the corresponding AverageRate cell. In this case, our destination currency was USD and our source currency was CAD. So we’ll paste this value into cell F22 as shown.
Repeat this process for each source currency. Be sure to paste the values into the correct AverageRate cell. DO NOT paste values into the ClosingRate cells.
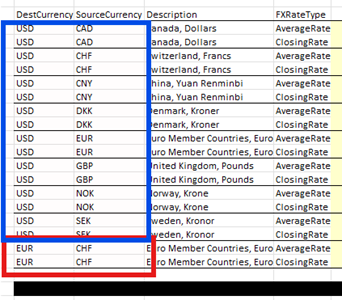
NOTE: Be sure to switch your destination currency over to EUR when getting values for row 38. You might mistakenly paste in values where the destination currency is USD. Good rule of thumb: if cells F38 and F24 have the exact same values, then you made a mistake and must switch the destination currency from USD to EUR.

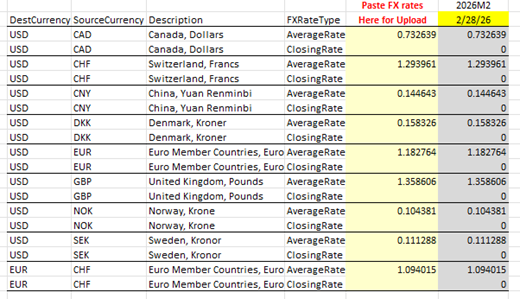
After getting all of the average rates, your Excel sheet should look similar to this.
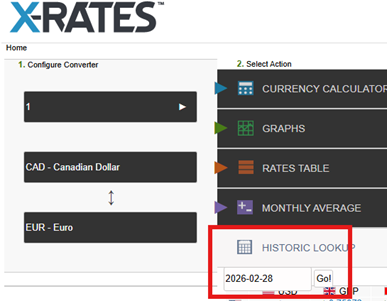
Hover over the Historic Lookup option. The date selected should be the last day of the month. In our example, we want to set closing rates for February, so we’ll set the date to be 2026-02-28 as shown. After the date is set, click Go!
You will be given a list of all destination currency (Blue) conversions for your selected source currency (Red).
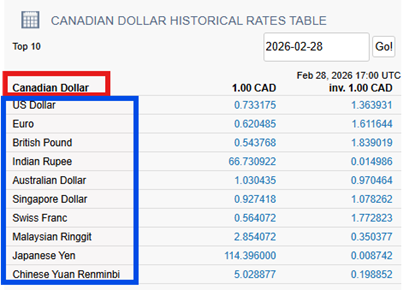
We’re only focused on the first set of decimal values. We currently want the closing rate for USD > CAD, so we’ll copy the first value as shown.
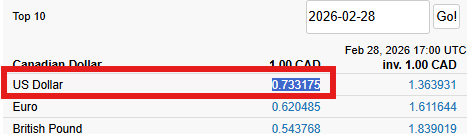
Now, we’ll paste this value into its corresponding ClosingRate cell. In this case, it’s cell F23. Repeat this process for all other source currencies just like the average rates
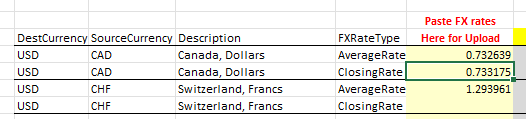
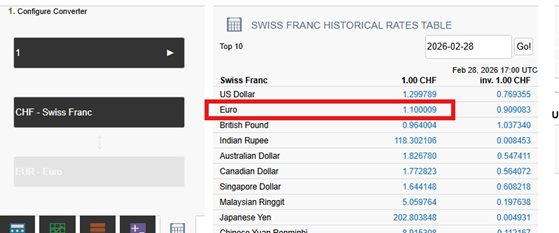
NOTE: Just like the average rates, we have to be aware of the last row having its Destination Currency set to EUR instead of USD. Be sure to copy the EUR value. DO NOT copy the USD value. Good rule of thumb: if cells F39 and F25 have the exact same values, then you made a mistake and must copy EUR value instead of the USD value.
After getting all of the closing rates, your Excel sheet should look similar to this.
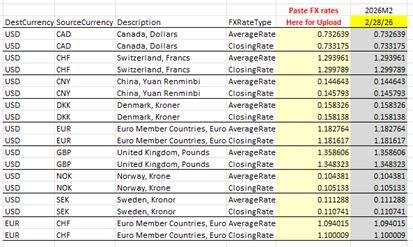
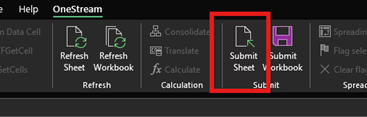
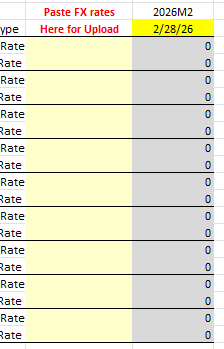
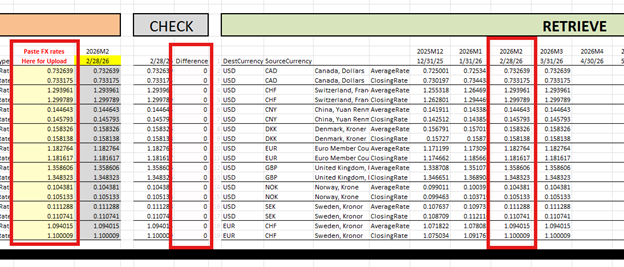
After submitting, you should notice that the Difference column has its values set to 0. The submitted FX rates will also appear in their respective date columns on the RETRIEVE portion of the table as shown.
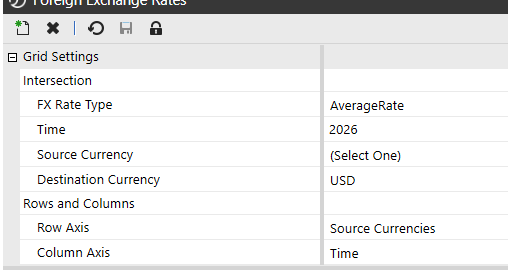
Make sure your FX Rates settings are set to the following:
- FX Rate Type: AverageRate (We’ll switch to ClosingRate afterwards.)
- Time: Current year
- Source Currency: None (Should be the (Select One) option.)
- Destination Currency: USD (We’ll switch to EUR afterwards.)
- Row Axis: Source Currencies
- Column Axis: Time
Search for the month that you pushed the FX rates to. In our example, we’re looking for 2026M2. You should see the FX rates populated under the month column.
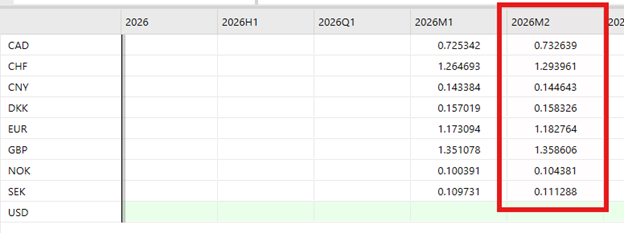
Finance has requested us to copy over imported FX rates into the current month for reporting purposes. These values will be overwritten the next time we update FX rates. In our example, we’re setting FX rates for February which would normally be completed on March 1st. So, we’ll copy the 2026M2 values into 2026M3 as shown.
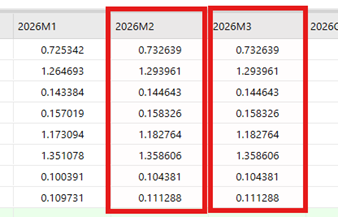
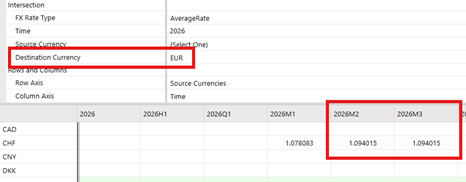
Do the same thing for EUR as well by setting the Destination Currency to EUR and copying over the values if it isn’t already completed.
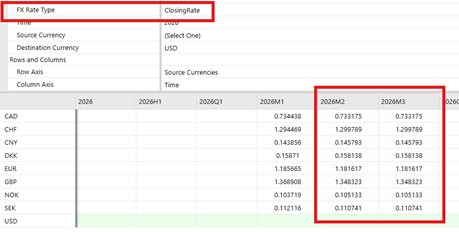
Finally, change the FX Rate Type to ClosingRate, and copy over the values to the next month just the same as we did for AverageRate. Don’t forget to check EUR.
Click the Save button on the top left of the screen to save any changes. The FX rates in OneStream are now properly set.
Updating the Task Scheduler
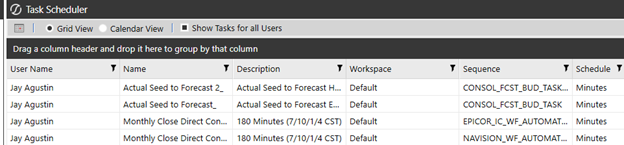
There are 6 tasks that must be manually set at the first of every month to include the following:
- Monthly Close Direct Connect – Epicor
- Monthly Close Direct Connect – Navision
- Mthly Late Month Direct Connect – Epicor
- Mthly Late Month Direct Connect – Navision
- Mthly Post Close Direct Connect – Epicor
- Mthly Post Close Direct Connect – Navision
The other tasks can be ignored. Ideally, the unused ones will be removed at a later date.
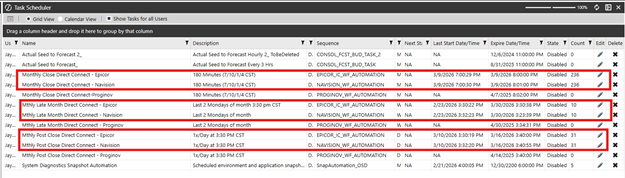
Each task can be edited by clicking on the Pencil Icon under the Edit column. Upon clicking this, the Edit Task window will appear. We will be primarily focused on two areas which are listed below:
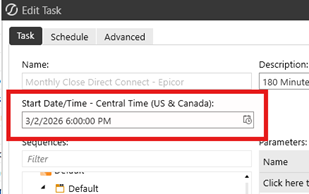
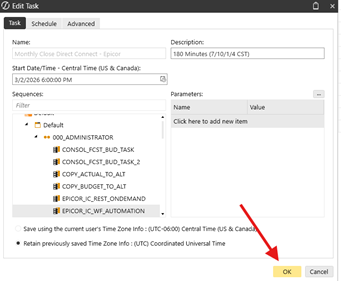
- Start Date/Time – Central Time (US & Canada):
- Located under the Task tab as shown.
- Expire Date/Time – Central Time (US & Canada):
- Located under the Schedule tab as shown.
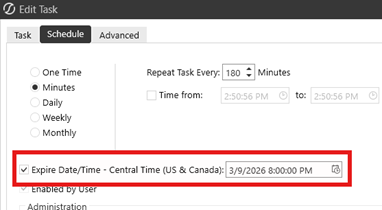
We will be referring to these dates and times as Start Time and Expire Time respectively. Each of the tasks will need their start and expire times changed. Note that these times are timed based off of work days which means we do not count weekends.
(Ex: If the first work day of the month is a Thursday and a schedule needs to run until the 6th work day, then we start the task on Thursday and expire on Thursday next week since that’s the 6th work day.)
Once each time has been set, click OK to save your changes and start the task on your new schedule.
Task Name | Start Time | Expire Time |
Monthly Close Direct Connect - Epicor | 1st Work Day of Month | 6th Work Day of Month |
Monthly Close Direct Connect - Navision | 1st Work Day of Month | 6th Work Day of Month |
Mthly Late Month Direct Connect - Epicor | Second to Last Monday of Month | Last Monday of Month |
Mthly Late Month Direct Connect - Navision | Second to Last Monday of Month | Last Monday of Month |
Mthly Post Close Direct Connect - Epicor | 7th Work Day of Month | 11th Work Day of Month |
Mthly Post Close Direct Connect - Navision | 7th Work Day of Month | 11th Work Day of Month |
Updating the Global Time
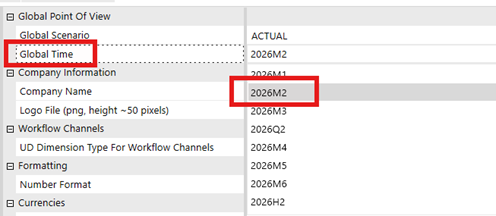
Every month the Global Time must be updated to prevent users from being locked out of their workflows. Currently, the Global Time is set to be the previous month instead of the current month. This process is subject to change as the finance department is supposed to let us know when it’s safe to change the global time from the previous month to the current month. For now, it’s best to stick with having the global time be the previous month as no complaints have been made so far.
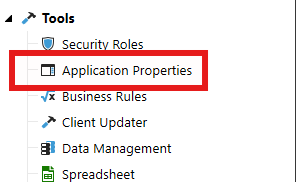
(Ex: The current date is March 1st, 2026, so the Global Time will be set to 2026M2)